June 10, 2014

Lake Geneva, WI

Hello, everyone! I recently went to Lake Geneva, Wisconsin with my family. I haven't been there since I was a little kid, so it was nice to go back and revisit those vague childhood memories. We strolled through the shops and went on a boat tour where we saw some of the famous locals' mansions and summer homes. We were also fed a decent amount of ice cream; it was fantastic!

Enjoy the pictures!


The long building in the background is a library. How gorgeous is that?!


This is the cutest picture I've ever taken! It's a man taking a picture of his wife on his cellphone. I ship it.


________________________________________________________________________________________________

That's it for our trip to Lake Geneva! I hope you've enjoyed the pictures. I loved going into the tiny shops and seeing all of the magnificent houses on the boat tour! It's refreshing to 'break out of the norm" every so often; you'd get bored otherwise!

See you next time,
Jordan x

June 5, 2014

Spring/Summer Favourites

Hello, everyone! I'm super excited to write this post, as it's something I've wanted to do for ages! Since spring has now passed and we're moving into the even warmer months, I decided to share with you some of the things I've been loving this spring/summer.

I decided to go in the order that I use/put on these products so you can get a better understanding of them.

Enjoy!


First up is the Renpure Argan Oil Luxurious Shampoo and Conditioner. To simply put it, if someone told me there was a shampoo and conditioner out there that worked better than these two, I wouldn't believe them. I've tried several other shampoos and conditioners in my time, but none of them hold a candle to these! It feels like a $50 product, but they're sold at my local Walgreens for only $5.79 each!

Renpure's whole line of hair products contain no sodium chloride, sulfates, dyes, salts, parabens or gluten. That's always a plus!

When I started using this duo, I immediately noticed a difference in my hair; its softer, smoother and doesn't dry out as time goes on. Every time I take a shower, I scare myself thinking I accidentally used the conditioner in place of the shampoo; that's how soft it makes my hair feel! You almost don't want to use the conditioner in fear of making your hair too greasy.

All of Renpure's products smell amazing, but the scent of their argan oil products is my favourite scent of all!
________________________________________________________________________________________________


This is probably my FAVOURITE product of the whole lot! It's the St. Ives Blemish Control Apricot Scrub. This is by far the best exfoliating product I've EVER used, and that's saying something! It's absolutely perfect for the spring and summer months as it's light, refreshing and smells of fresh apricots.


It's 2% salicylic acid (The stuff that fights breakouts) and has all natural exfoliants, such as walnuts and corn kernels; none of those pesky little beads that only get under your fingernails.


One of the main problems with products directed towards acne-prone skin is that they tend to dry your skin out and leave it more irritated than before, but that's not the case with this one! This scrub leaves my skin completely hydrated and smoother than its been with any other exfoliator I've used. Not to mention I've seen a dramatic improvement in my skin. It's clearer, brighter and looks a lot healthier! I'll definitely be repurchasing this!
________________________________________________________________________________________________


Another one of my favourites this spring is the Sally Hanson Hard as Nails Xtreme Wear nail varnish in the shade Violet Voltage. I would describe this colour as a light, lilac-y purple with a gorgeous, satiny sheen to it. For some reason, it's not the same light purple it was before. I've had it since May of last year and since I've used it for so long, I think it must've oxidized. It comes out much darker colour, but still very lovely!


I believe this nail polish will compliment any skin tone. I have quite yellowy skin, and I think the purple contrasts with it beautifully. It looks fabulous on women of darker complexions as well! It's a gorgeous, vibrant shade for both spring and summer. Anyone can rock it!


These are my nails, painted with only one coat of nail polish and no top coat!

As far as the formulation goes, it glides on beautifully and dries in a reasonable amount of time. It's not one of those polishes that take ages to dry, nor is it a '60 second'er. I suggest you sit back and enjoy an episode of your favourite show whilst waiting for them to harden!

This nail polish also stays on for a painfully long time. If you don't chip at the paint or remove it with nail polish remover, it could easily last you a month on your fingers, maybe 2-6 on your toes!
________________________________________________________________________________________________


My next favourite is the L'Oréal True Match Minéral Pressed Powder in colour Light Ivory. It's a pale, warm-toned powder that perfectly matches my skin! It's not a very heavy-coverage powder, which is why it's more suited for the warmer months.


The powder is brilliant for stopping shine without giving a completely matte finish to the skin. It's not the best for covering up spots, but if you use a concealer brush and a decent amount of product, it kind of works!


Every day, I brush a thin layer of powder over my face to even out my complexion and slightly lighten my freckles. Then, I go back in with a concealer brush and concentrate on the areas where I may have breakouts.
________________________________________________________________________________________________


Next up, the Eyebrow Kit by H&M! I am absolutely in love with this. I never pictured H&M coming out with their own makeup products, but it's only a big 'duh' that their packaging would look like this! Can we just talk about this for a second?! It immediately caught my eye when I walked in the shops.


This compact is brilliant if you plan on doing your friend's or client's makeup. It's the holy trinity of eyebrow shades, squished into one stylish compact! It's even completed with a set of tweezers and an angled brush. It's a gorgeous product (and packaging) for the cost of $5.99.

What I'll normally do is fill in my brows with the lightest brown colour. Though my hair is naturally dark brown, I feel it looks funny when I use a matching colour on my brows. If I have a bit more time, I'll run the darker brown shade through the tails of my eyebrows for a little more definition.


Did I mention the packaging is shiny?!
________________________________________________________________________________________________


I got these cute Rose Bow Scrunchies at Rue 21 for $5.99! I've wanted scrunchies for ages now, as they're supposed to be less damaging for your hair than the standard ponytail. When I saw these scrunchies, I thought they were too cute to pass up!


One bow is a solid, pale pink colour and the other is darker one with creme flowers on. It's not very visible in this picture, but the two bows are very different textures. The bow on the left is made of a very soft, silky fabric whilst the one on the right is made out of an almost waterproof material, but still comfortable to wear!

These scrunchies can be worn with anything from jean jackets to a dress. I sometimes wear these at night if I don't want my hair to get tangled whilst sleeping. I think this style of hair accessory can be worn all year-round! Due to their springy colour, I decided to include them in my spring/summer favourites.
________________________________________________________________________________________________


And here are my beautiful sunnies! I got these from an '80s themed store called Ragstock. They were $5.99 each and I have to say, they're a great value for the price! They're a kind of wayfarer shape and I absolutely love them! I have a sort of oval-shaped face, but I think this frame suits everyone.


The designs on the sunglasses are quite floral, which I adore. The first pair to catch my eye was this blue, green and cream-coloured pair. It's wasn't the obvious choice for me, but that's why I like them so much! They kind of remind me of curtains. I feel like this pair will go wonderfully with a cream, blue, brown or greenish-khaki-coloured top.


This second pair will probably be up more peoples' alley! The frame is mainly black with pink, purple and light blue flowers on. This would go great with a black, purple, white or grey top!

I wear these glasses pretty much everywhere. I've noticed this spring that my eyes have become a lot more sensitive to light than they ever were before. I'm constantly having to wear glasses to protect myself from headaches! These are great at blocking out the sun.

I'm not sure where else to find these glasses, as the store I got them from wasn't part of a chain, nor have I seen stores like it before. I'm sure you can find a pair similar to these in most shops! I feel like they'll be a big trend come this summer!
________________________________________________________________________________________________

Thank you, everyone, for spending your time reading this post! I hope you've enjoyed yourselves! Don't forget to keep scrolling if you want to see more of me (or 4 little birds).

Have a lovely summer! Remember that you can do anything in life, you just have to make it happen!
Jordan x

May 30, 2014

Baby Birds Under the Deck

Hello, everyone! On May 5th, I found a nest of newly-hatched birds on a beam holding up my deck (It's hard to explain). Every spring, a bird lays its eggs in one of the vacant nests we have sitting in the rafters. This year, I just happened to catch the beginning of life for four young birds!

I'll be the first to admit, I don't know a thing about birds. I haven't got a clue what kind of birds these are or when exactly they were born, but I decided to take pictures of them anyway to track their everyday growth and how long it takes them to eventually leave the nest. Of course, I was extra careful not to touch anything or disrupt their development process in any way!

I believe the day I found the chicks, they were a couple days old. I don't know what kind of birds they are, therefore I couldn't tell you what they must've looked like when they were born! They lived in the nest for a week and a half and ended up leaving on May 15th, approximately 12 days after they were born. It was kind of bittersweet watching them leave, as I spent so much time thinking about them and watching them grow and eagerly waiting to get home, just so I could see them. Now I understand the term 'Empty Nest Syndrome'!

Anywho, enjoy the pictures of these little birds!

Day 1


Day 2


Day 3


Day 4


Day 5


This was the mother carrying worms to the babies. I thought it was super adorable!

Day 6

I missed Day 6! I'm sure you can imagine what the chicks looked on this day; a little less fluff and a little more feather!

Day 7


Day 8


Day 9


Day 10


This is the first good view I got of their bellies. I always assumed they were robins until I saw their speckles!


Day 11


And then they were gone.

I hope you enjoyed this time lapse of the little birds' lives! Thank you for reading!

I hope you've had a lovely May,
Jordan x

May 5, 2014

My Thoughts in a Day

Hello, everyone! So last night when thinking of blog posts I could write for you lot, I came up with a brilliant idea. I'm sure I'm not the first to do this, but I decided to track all my thoughts in one day. There's no real meaning behind this post but who knows, maybe I could use it for a psychology report one day! The more I think about making this, the dumber it seems. So lets get into it, shall we?
________________________________________________________________________________________________

10:16 (Waking up) It's too bright in here.

10:22 I'm going to have to get out of bed and go to the bathroom soon.

10:54 Why does my house smell of eggs?

11:12 I wish I had cable television.

11:19 How genius is a picnic basket with different compartments?!

11:22 I want to grow out my hair like Zoella.

11:34 There's so many things I want to do today; I should make a list.

11:42 Leftover Chinese food is the best Chinese food.

12:05 I could so be an actress.

12:39 I love blankets.

15:15 Chalkboard spray paint sounds like a good idea.

15:20 (Whilst spray painting my wall) I've never spray painted anything before, how do I know if I'm doing this right?

15:21 I hope I don't get my hamster high.

15:26 Who originally thought about putting wheels in hamsters' cages?

16:06 "If only you saw what I can see..."

16:24 I could be a business woman!

17:49 Am I in the mood for a hot or cold drink?

18:30 Will I do for my birthday this year?

19:54 I wanna go see a movie.

20:24 I know less about technology than I thought.

20:27 Pizza?

20:31 How did someone ever come up with musical notes?

21:08 How do I get on the Ellen show?

21:18 Gosh, I love smoothies.

21:24 How cool would it be if I got to interview somebody?!

21:28 I'm gonna have great style one day.

21:32 A little scroll through Instagram won't hurt.

23:18 Bad idea.

12:02 Maybe I should get an early night so I can be productive tomorrow.

1:35 I'm still hungry.

1:36 I can't get up now, I'm in my bed!

1:36 So cozy.

2:06 I can't sleep.

2:24  Where did the word 'adhesive' come from? Who invented the word 'adhere'? I wonder if inventing words is like discovering a new disease or a new species of bug; do you just create a word based on your name and put a meaning to it? Like the expression, "I'm just joshin' ya," I bet you Josh doesn't have a clue about how famous he is now! If I were to create a word, it'd have a plethora of meanings. I'd want it to either be a compliment or one of those weird words you say when you're frustrated like, "Aw rats!" I wish I would've invented the word 'fooey'.

2:38 Okay, time for bed.
________________________________________________________________________________________________

Thanks for reading this short, pointless blog post! Tracking all of your thoughts in a day is harder than I expected! I had a lot of fun making this, so I tag you to do the same! Whether you make a blog post put of it or write them down in a notebook, try tracking all of your thoughts in a day. I'd love to read your minds!

Have a wonderful May!
Jordan x

March 17, 2014

Healthy Avocado Pesto Noodles

Hello, everyone! In the spirit of St. Patrick's Day, I decided to share with you one of my favourite creations. It's delicious, healthy, and very green! Avocado Pesto Noodles! Enjoy!


For this recipe, you will need:
1 large avocado
1 tablespoon pesto
1/2 to 1 teaspoon minced garlic
A good shake of Himalayan or sea salt
Nutritional Dry Yeast (Substitute for Parmesan cheese)
Liquid Aminos (Substitute for soy sauce)
A squeeze of Sriracha (Optional)
A splash of olive oil
___________________________________________________________________________________

Directions:

1.) Take your avocado and mash it up in a bowl. Don't worry too much about chunks at this stage as we'll be further mashing!

2.) Add in your pesto and garlic and mix thoroughly.
_________________________________________________________________________________

3.) Add in your olive oil and Sriracha. This makes the mixture maneuverable and adds more depth. If you don't have Sriracha, any other hot sauce will do! You want to add enough to where you get the flavour, but not the spice. A few drops is all you need!
_________________________________________________________________________________

4.) I would next add in your Nutritional Dry Yeast. If you don't have this in your cupboard, an ideal alternative is a sprinkle of Parmesan cheese. This is a healthy substitute, and it tastes exactly the same!
_________________________________________________________________________________

5.) At this point squeeze in some lime to keep your avocado from browning. Taste your magnificent creation to see how much (or how little) salt you would need.
_________________________________________________________________________________


Going with the green theme, I prepared some spinach Shirataki noodles, plonked them in a bowl and dalloped some of the avocado-pesto mixture on top. You can of course use any other type of noodle with this! I find this is the most enjoyable way to eat it, though I'm not sure why. You can also pair this with tortilla chips, as it doubles for an awesome guacamole!

If this appeals to you at all, feel free to recreate it! Take a picture, post it to Instagram and tag me at @jordanndaniielle! I'd love to see your version of it!

Thank you for reading! If you didn't like this post, I hope you'll enjoy some of my previous ones!

Happy St. Patrick's Day!
Jordan x

February 20, 2014

Greatest Vegetable Fried Rice Ever

Greetings, everyone! My dearest apologies for the lack of posts recently. It's been quite the task, setting up this blog and coming up with ideas on what to write about. I worked hard in December to get everything sorted and ready for launching, so January was sort of my relaxation month. I then planned on making a post or two about Valentine's Day, but I just hadn't got the time. But I'm back now and more determined than ever to create the best, most visually appealing content for your little eyes! I hope you stick around!


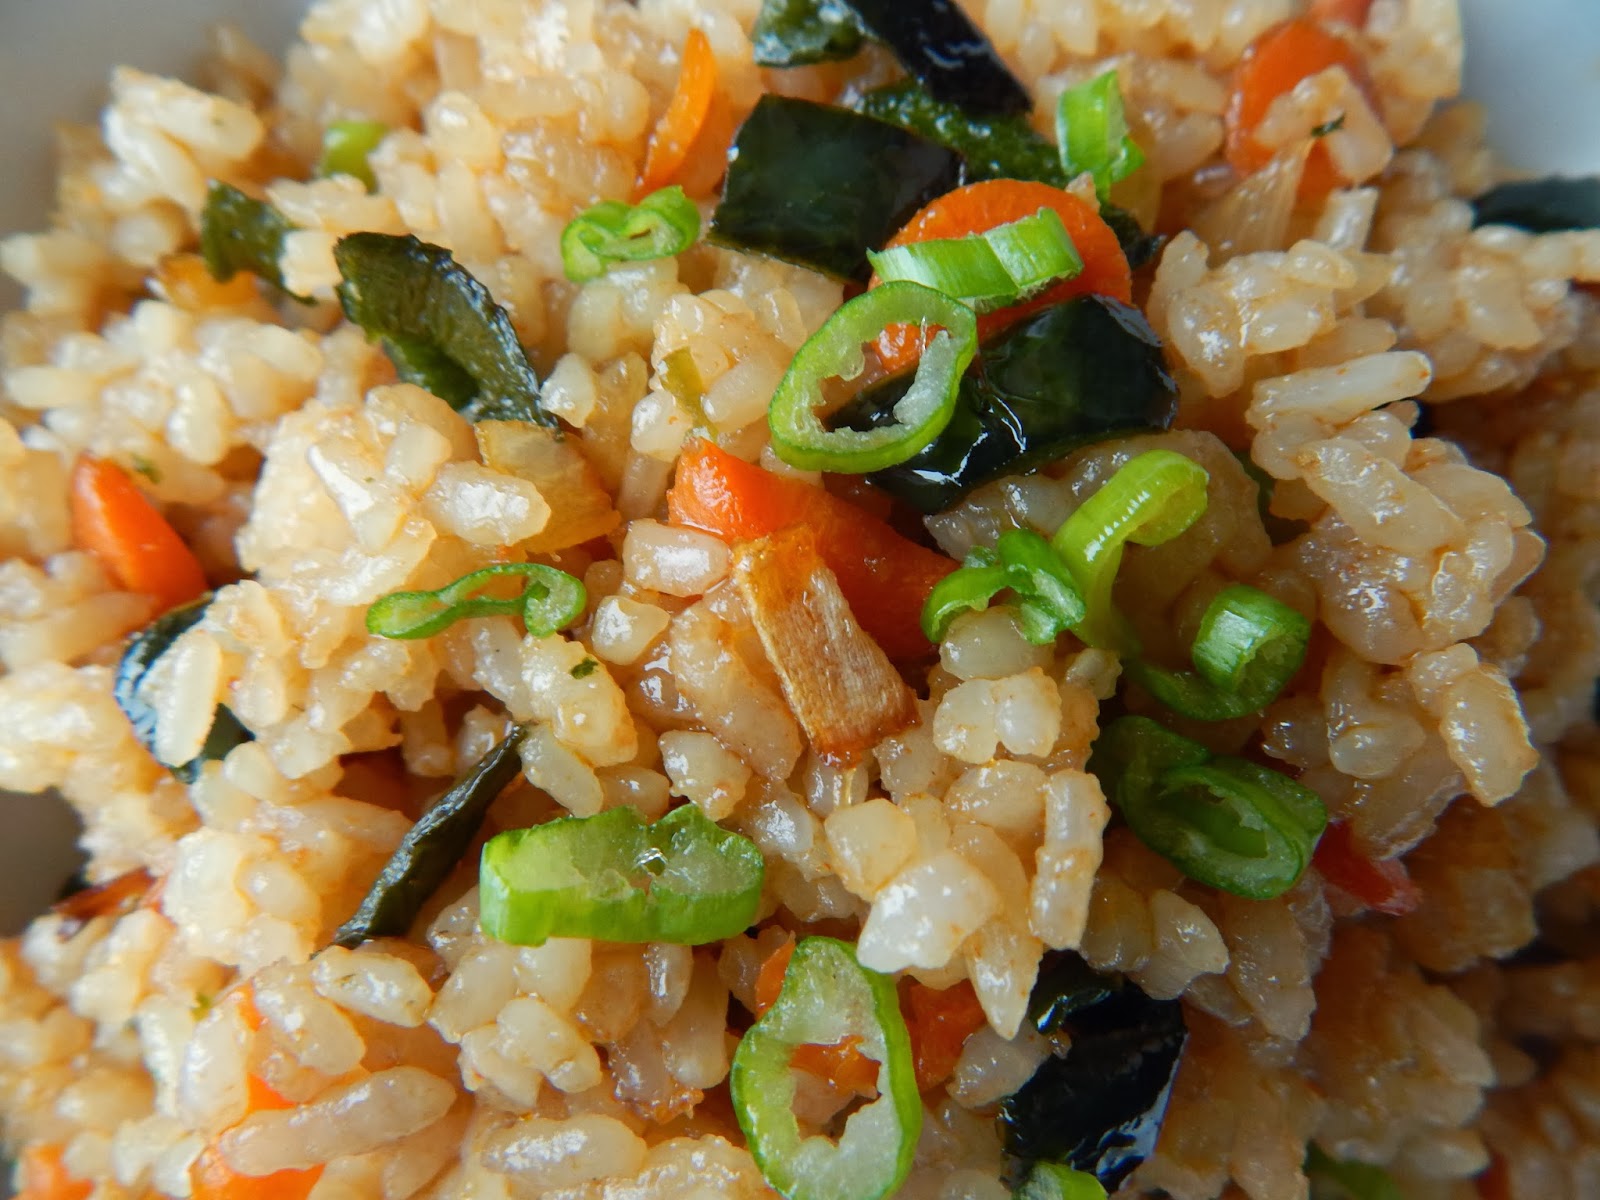
Today's post is all about the wondrous world of fried rice. If this doesn't tickle your taste buds just by the looks of it, I don't know what will! This is a great dish for any occasion. Any kind of party, gathering, shindig or get-together would be the perfect opportunity to whip out this recipe and make mouths water!


At first, I wasn't quite sure which direction I was going to go in, but I'm very happy with the results! From my eyeballed measurements and lack of knowledge on the expansion of rice, I estimate this dish feeds up to 2 or 3 people. If you're cooking for more than 3, you can easily double or triple the amounts of ingredients you use.

_________________________________________________________________________________


For this recipe, you will need:
2 medium-sized carrots
1/2 large yellow onion
1/2 poblano pepper
Srircacha
Chives (optional)
Toasted sesame seed oil
Liquid Aminos (Subsitute for soy sauce)
A whole lot of coconut oil (or other cooking oil of your choice)

_________________________________________________________________________________

Step One:
Make your rice 10 to 20 minutes in advance. For this recipe, I used 1 and 1/2 cups of milling rice to 2 cups of water. This made enough rice for 1 to 2 people. Depending on the type of rice you use and how many people you're cooking for, you can double or triple the ratio they print on the package. I initially chose this rice because it was the only kind I had in my pantry, but later found it worked great for this recipe!
_________________________________________________________________________________


Step Two:
Chop up all your vegetables. It doesn't necessarily matter which style you cut your vegetables in, but I went for the class chop. Whilst getting your vegetables ready for sautéing, scoop a solid 2 to 3 tablespoons of coconut oil into your pan. This gives it time to warm up and melt so it's ready to go when you finish preparing the veg'. When your coconut oil is fully melted and your pan is warmed through, you can add in your vegetables.
_________________________________________________________________________________


Step Three:
Once your onions are translucent and your carrots soft, it's time to add your toasted sesame seed oil, Liquid Aminos (soy sauce) and Sriracha. You need to make it extra flavourful at this stage, as it's harder to add more later when you've already got your rice in. Let this bubble away for a couple minutes so all the flavours can marry.
_________________________________________________________________________________


Step Four:
Chuck in your rice! Incorporate your vegetables into the rice and mix thoroughly. I find it easier to combine them when I'm using two utensils such as wooden spoons. If necessary, add anything more you need to make your rice taste as best as it possibly can! If you're looking to add a bit more colour to your meal, finely chop some chives and add those to the mix! Adding them at the last minute gives a nice freshness and texture to the dish. Might as well throw some on top as a garnish!
_________________________________________________________________________________

Step Five:
Dig in! I feel there's nothing more satisfying than enjoying the fruits of your labour! Share with your friends and family, or maybe pack it for lunch tomorrow! Grab some Tupperware and take the party with you wherever you go!
_________________________________________________________________________________


Well there you have it, folks! Five easy steps to one of the greatest, healthiest, most delicious meals you will taste in a very long time! I hope this has aided you or gave you some inspiration on what to make next! You can always tweak the recipe to your own taste. Don't be scared to make it your own! If you're not interested in making it yourself, I hope you at least enjoyed the pictures!

I had such a great time making this. I love to cook, and I hope I've encouraged you to do something creative with the things in your cupboards! If you'd like to see more posts like this, please let me know by clicking the comment button below and leaving some reassuring messages! Leave any food suggestions you have as well!

Thank you for being so patient with me!

Jordan x